- Large operating room for treatment.
- Lots of pipes and connectors.
- Minimalism in colour of assets and decor (mostly whites, greys & chrome).
- Sterile environment
- Robotic arm planted on either ground or ceiling
- Futuristic
- Sharp and edge based look
Objectives & Requirements:
- Breakdown Tasks
- Split into smaller components
- Adapt good work flow
- Keep things simple, no complex modelling
- Maya level - intermediate
Creating the environment proved a bit of a challenge because I was trying to be creative with the assets but at the same time I found it hard to imagine what a futuristic spaceship may look like. Setting targets and goals for myself really helped a lot as it made my work flow go a bit quicker. Prior to modelling I did research from films and a few industry practitioners.
The dimensions to my environment above are in inches and they measure Width:180 Height:96 Depth:300. This is very important as it is something I will need when I transfer the model over to after effects to incorporate my footage.
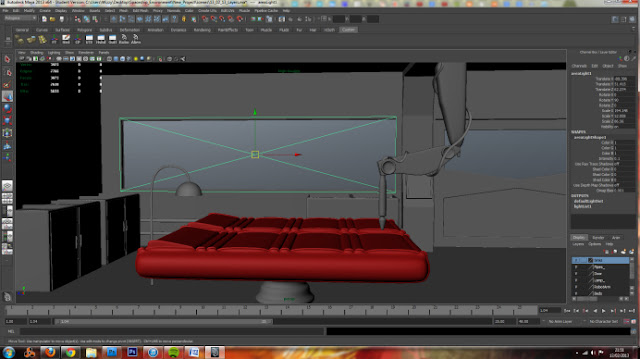
Above are the initial designs I did in the room, I began by modelling the beds, extracting the windows and the doors and finally modelling the robotic arm. I decided on attaching the arm on the ceiling instead of the floor because this gave it more movement around the patients. I reversed the normals of the cube in order to see the assets I was modelling.
Above is the close up of the arm with a cable I created using the CV curve tool.
Above: I added more assets such as sinks, lamp and pipes. I had an opportunity to use Nurbs and Subdivisions, opposed to Polygons that I always use.
Above is when I was adding an area light as I was experimenting on rendering using Metal Ray,I used mental ray materials on some of the objects. With Mental Ray, I can achieve such effects as glass and chrome.


No comments:
Post a Comment