Showing posts with label environments. Show all posts

Wednesday, 9 May 2012

Tree-house Development

Developing my tree house was very exciting, it took me a little longer than two weeks as I kept changing and advancing my ideas, most of the time went on texturing. I kept keeping an eye on my poly count as my aim was to keep the geometry low poly. I deleted all the unneeded faces under the steps and inside the hut and tried not to bevel a lot . I found that texturing was very important and time consuming, so i tryed to model the geometry as fast i could and spent more time texturing. Photoshop played a huge role when it came to manipulating my textures. 
I took a few screen shots to show the progression of my work.


Above: The steps, poles and decks significantly increased the number of faces as I did a lot of 'duplicate specials'.


 Above: The hut increased the faces to just above 2000.


Above: I brought in the UV snapshot to Photoshop to start adding textures.


Above: After I added the textures, I brought them back to Maya and assigned them to my geometry.


Above: I added a green wood texture to the steps, poles and deck.

Sunday, 1 April 2012

Tree-house Research

As part of my environment, I wanted to add a central location to it, after some research and thoughts, i decided a tree house would do the trick. A tree house would be fairly easy to model on Maya as well as a tree as we've been given a tutorial on how to model and texture a low poly tree. I gathered some images of different types of tree house that would look good with my environment, I've shared a few below:


Most of these ideas would be manageable to model and keeping the poly count low, but i don't intend on creating an overly large house, I will keep it manageable.

Tuesday, 27 March 2012

Game Environment Ideas

The look I am going for on my game is an enchanted forest. I want it to look natural, down to earth and yet have a fairy-tale feel to it, so I decided to add floating rocks. The floating rock will make it seem like the world is in a different dimension with the physics all different. Below are some images i gathered to help me archive my aim. 


Below are the ideas of the forest look I want to go for, as you can see it contains a lot of greenery in trees and grass:


I then began researching on floating rocks and how  could incorporate them into my scene, here are a few examples of high poly rocks: 


Monday, 31 October 2011

Studio Brief 4 : Build - Floorplans

When i started the floor plans I wanted the building to be better than it seems, there's more to it than meets the eye. For example above the building there's an open compartment which helps bring electric power to the building, almost like how solar energy works. The floor plans helped me achieve a different view that you wouldn't normally see when viewing from a simple 2 point perspective view. The blue prints are below :


Thursday, 20 October 2011

Jaime Jones : Concept Artist


Jamie Jones is an experienced illustrator and concept design artist. He's worked for companies such as Warner Bros, Paramount, Blizzard, National geographic and more. His portfolio contains outstanding work that has influenced me in terms of painting my character on photoshop. I particularly like the way he uses colour to make his work look like its been done on traditional canvases. I will use his work as references for my future projects.

Jamie Jones

Studio Brief 4 : Build - Character Space

Below is the development of my environment, i first sketched it on my sketch pad, I then scanned the image on to photoshop for painting it. The environment of my character is a Scientist lab with a capsule in the middle of the room where the character is experimented on. the room is dome shaped and it has a number of controls on the walls that control various features in the room. The capsule has its own power source as it conducts a lot of power.


This is the character space from a different perspective 

Character Development

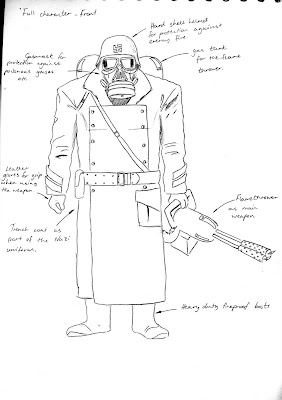
Below is my character in development, I sketched my character on a plain sketch pad using a mechanical pencil, i find using this sort of pencil easier because it allows you to put more detail into your sketch. I drew a range of character before i ultimately came to a final one I wanted to work on.


Tuesday, 11 October 2011

Studio Induction : Lighting

On our lighting induction we were shown how to mount enlincrome studio lights, soft-boxes and tripods. we then took a series of images to show our understanding on how lighting can work affect imagery. I was also given a chance to use canon macro lens as the objects I was using as my models were small. The macro lens helped me gain small detail on the images, also it helped me achieve differential focus on my images. Non of the images below have been manipulated on photoshop.


Below is a series of raw images I took using the Canon 1000D

 Above : Differential Focus
 Above : Differential Focus, Macro Lens
 Above : Differential Focus, Macro Lens
 Above : Differential Focus, Macro Lens
 Above : Differential Focus, Macro Lens

Above: Light hitting from the left, creating strong shadows 

Steve Simmons : Concept Artist


Steve Simmons is an influential concept artist, illustrator and storyboard artist. His previously published art is for films such as A Clockwork Orange, 7even Lives & Star Wars. His artwork has influenced me to draw environments which are dark and horror like. Most of his concept art is based on horror films with a lot of blood, gore, heavy rain and dark skies. I'm basing my character in these type of environments. 


Below is the link to Steve Simmons work :

AirWorkArt : Home

Thursday, 6 October 2011

Studio Brief 2 : Archetype

I was required to create a character to fit a certain archetype. On my last blog post I mentioned my character fits the "Shadow" Archetype. I have hand drawn the character & digitalised him on photoshop, i added colour to his structure & now the character has a more realistic look. the images below show the development of the character :


Tuesday, 4 October 2011

Studio Brief 1 : Collect - Moodboard

This is my mood board which consists of all that will relate to my character. This will help me develop my character in an easier way, helping me decode what his mental and physical features are.


Studio Brief 1 : Collect

During our visit to the Royal Armouries, we were required to take a number of photographs that may inspire us to create our characters and environments. I took a series of 25 images, below i have posted a few of of the images that i took. At first i did not know what i wanted to base my character on, but after a bit of research, flicking through the images and using my own imagination, i came to a conclusion.


Below are some of the images that inspired me as i was in the process of creating my character :


Sunday, 2 October 2011

My Character Archetype

After careful consideration, I decided that my character archetype should be a Shadow. A Zombie or a walking dead character can be classed as a shadow, these characters are to make a normal human being feel uneasy and far from being safe. I first wanted my character to be an Anti Hero, this is a character that should classically be disliked but in my context he would have played the lead role which means the audience should sympathise and/or like him, but the shadow archetype is more fitting.

Other types of archetypes :


Darth Vader is a good example of a Shadow archetype 


Other archetypes are: 

Willing Hero : King Arthur; Leelu from The Fifth Element; Hercules

Unwilling Hero : Bilbo Baggins from The Hobbitt, Phillipe Gaston from Ladyhawke

Cynical Anti-hero : Han Solo from Star Wars

Tragic Anti-hero : Lestat from Ann Rices' Vampire Chronicles; Darth Vader from Star Wars

Group-oriented Hero : CuChulainn from Irish myth.

Loner Hero : Indiana Jones, Xena from Xena: Warrior Princess

Catalyst Hero : Any mentor (s/he's the hero of their own stories)

Weetabix Advert & The Behind the Scenes :

I like the creativity of this video, they used popular culture music i.e dub-step to introduce the product to a younger audience. In the making of the video we were shown different techniques used to make this advert. the techniques used were the green screen technology, life size costumes, puppetry and high speed cameras. if i were to do a project similar to this i would like to use these techniques but i would also use Maya for animation to make things much easier & cost effective.


This is the final product


This is the behind the scenes

Thursday, 29 September 2011

Photoshop Session w/ Simon:

I had a 5 hour photoshop session with Simon and i learnt a lot in that short space of time. Below is an image that I managed to manipulate during the session:

Before the image was manipulated:

After the image was manipulated: